
Staff
How to set up Edumail in Outlook
Press “Start” and click on “Control Panel”
 Click next to “View By:” and make sure “Large Icons” is selected
 Click “Mail”
 Click “E-mail Accounts…”
 Click “New…”
 Fill in your name, @Education Email Address, and Password, then click “Next”
 If the following prompt appears, click “Don’t ask me about this website again” and then “Allow”.
 A prompt asking for your password will appear. Click “More choices” and “Use a different account”.
 Under “Username” type “EDU001\Your TO Number”
For example, “EDU001\0812345678”
Enter your Edumail Password under “Password”
Tick “Remember my credentials”
Click “OK”
Under “Username” type “EDU001\Your TO Number”
For example, “EDU001\0812345678”
Enter your Edumail Password under “Password”
Tick “Remember my credentials”
Click “OK”
 The “Add Account” dialog will take a few moments before it confirms your account. Click “Next” and then “Finish”, and open Outlook.
Outlook will begin downloading your emails and you will see them in a few minutes.
The “Add Account” dialog will take a few moments before it confirms your account. Click “Next” and then “Finish”, and open Outlook.
Outlook will begin downloading your emails and you will see them in a few minutes. |
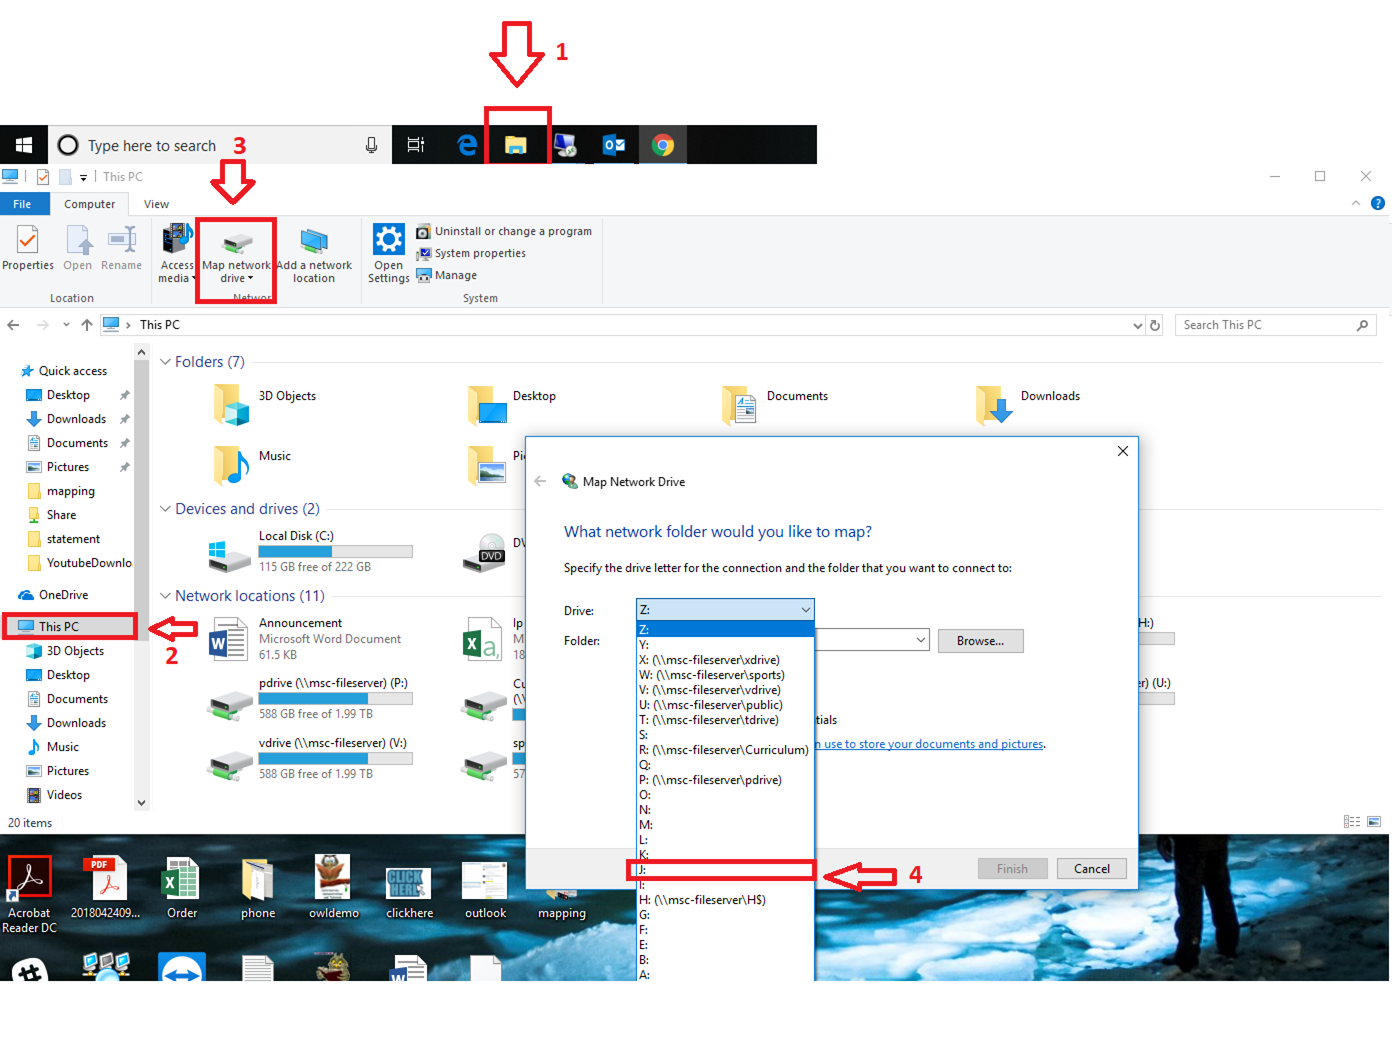
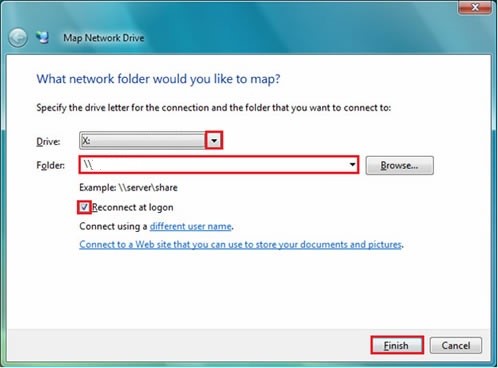
How to map curriculum drive on windows
|
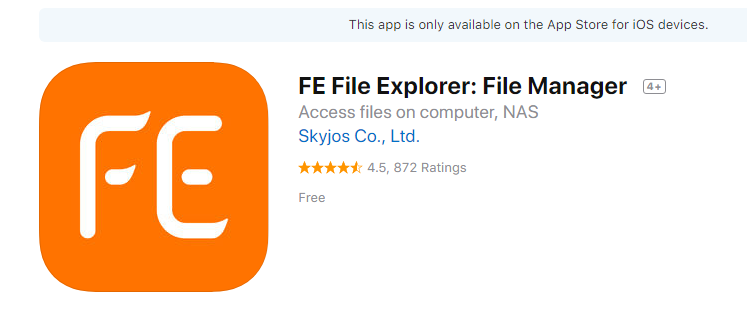
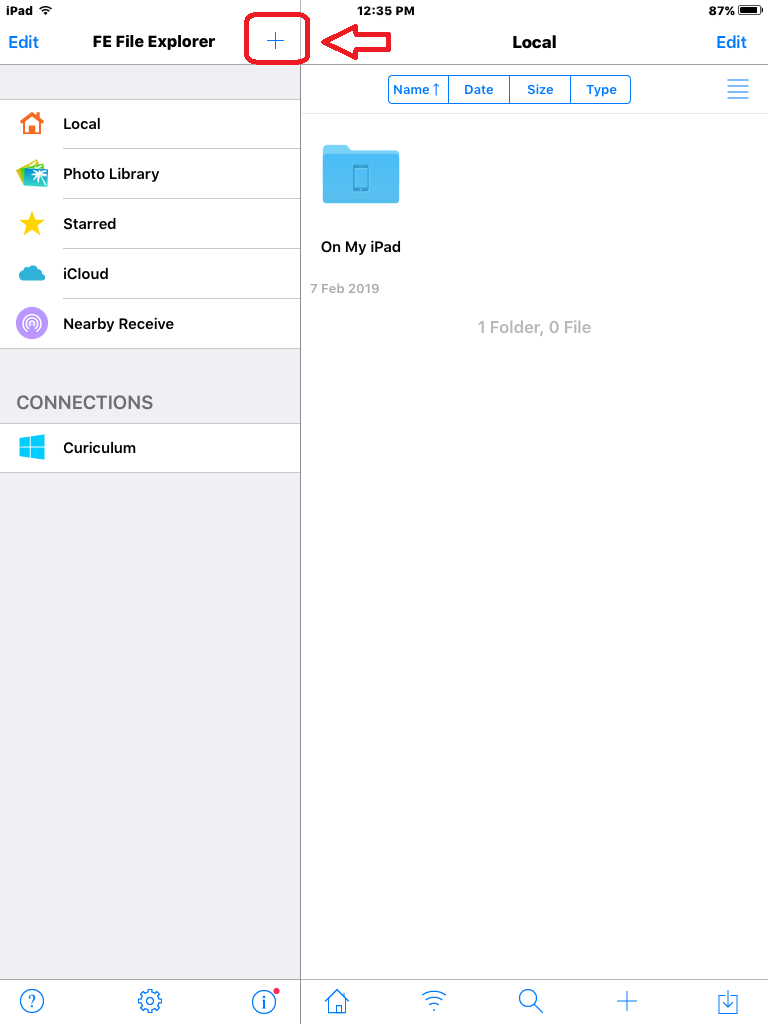
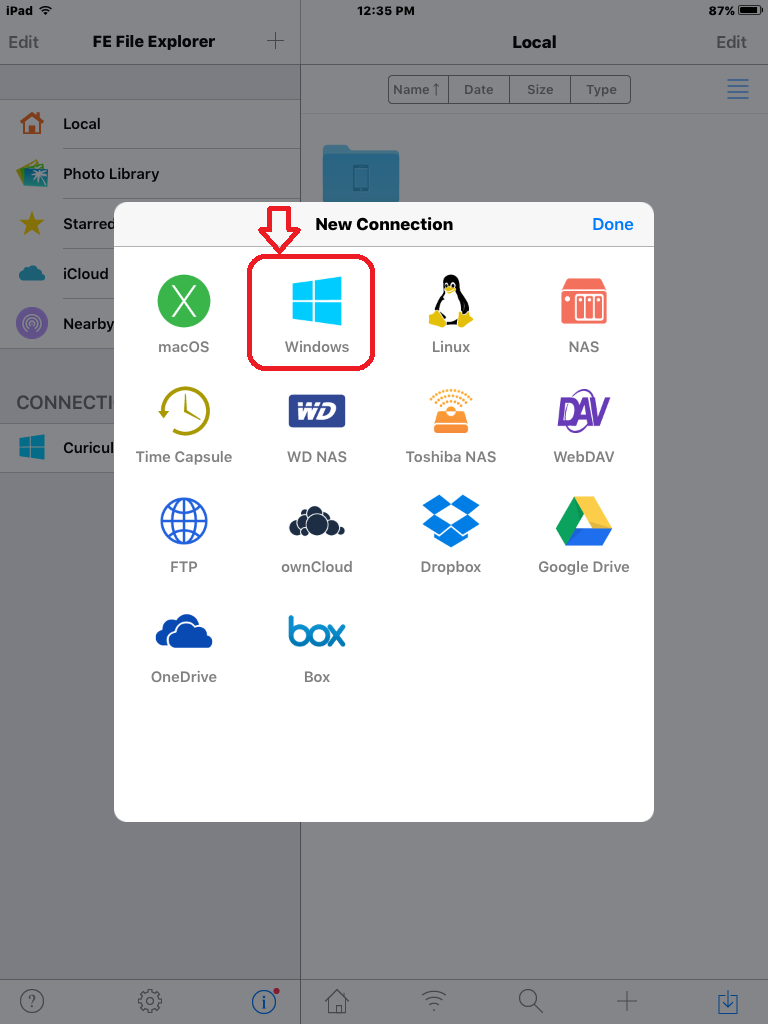
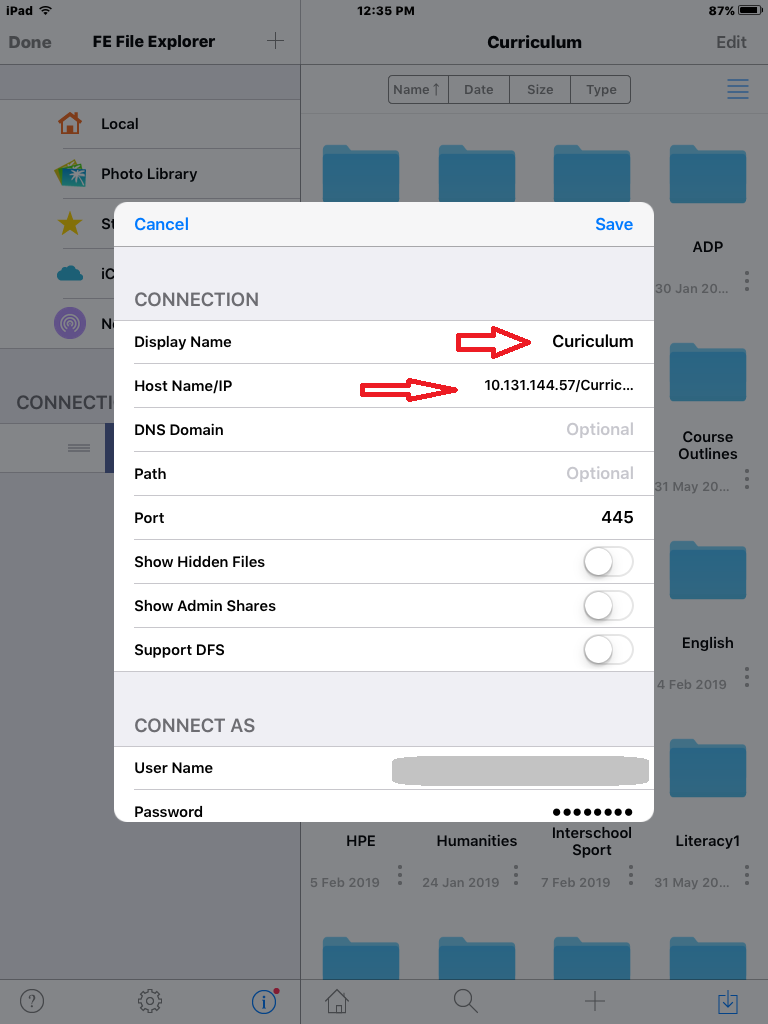
How to add curriculum Drive on Your iPad
|
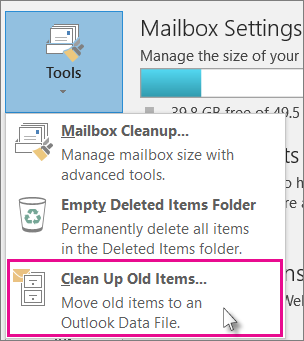
How to Archive My EMail in Outlook 2016 For Windows Every day your account gets flooded with new emails, making your inbox a cluttered mess and also increasing the size of your Outlook file. Use the archive feature in Outlook 2016 to keep your mailbox from growing out of control. When you archive email, it saves the messages in another Outlook data file (.pst), which you can open at any time. Meanwhile, the Outlook file that you work with every day stays lean and mean. By default, Outlook automatically archives old items on a regular basis. You can, however, change how often Outlook archives, where the archive file is stored, and other options. 1. In Outlook 2016: Click File > Info > Tools > Clean up old items
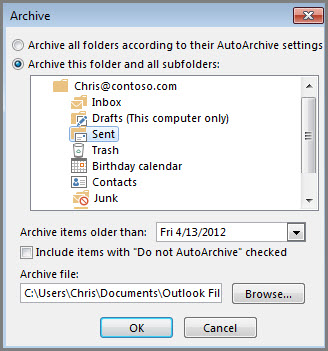
2.Click the Archive this folder and all subfolders option, and choose the folder you want to archive. 3.Under Archive items older than, enter a date.
4.You can create multiple .pst files if you want to archive some folders using different settings. For example, you may want to keep items in your Sent folder longer than items in your Inbox folder. 5.Check the Include items with “Do not AutoArchive” checked box to archive individual items that are excluded from automatic archiving. This option doesn’t remove that exclusion from these items, but instead ignores the Do not AutoArchive setting for this archive only. 6.Click OK. Turn off AutoArchiveTo archive only when you want, turn off AutoArchive.
|
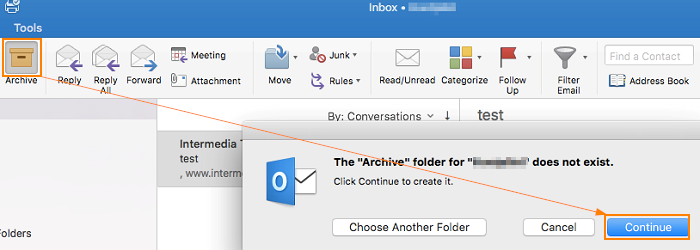
How To Archive Mailbox Data In Outlook 2016 For Mac Outlook 2016 for MacImportant: Archive button is available only on Exchange 2016 To start using local Mac archiving, you would need to create the Archive folder. To create Archive folder: To create Archive folder choose one or more messages that you would like to archive > chose Archive on the ribbon. As soon as you choose Archive, you will get a prompt The “Archive” folder for “Microsoft” does not exist > to proceed click Continue button. The Archive folder will be automatically created.
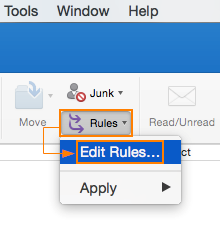
After the folder is created you would need to set up an archiving rule:
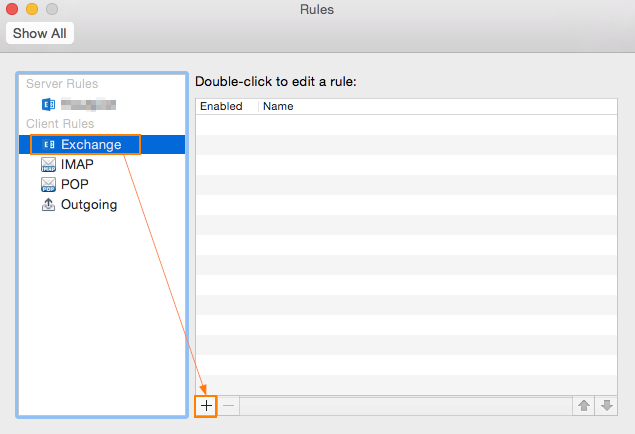
2. Select Exchange on the left pane menu and click on ‘+’ to add a new rule
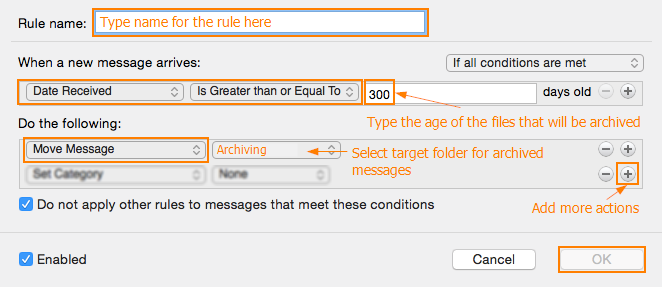
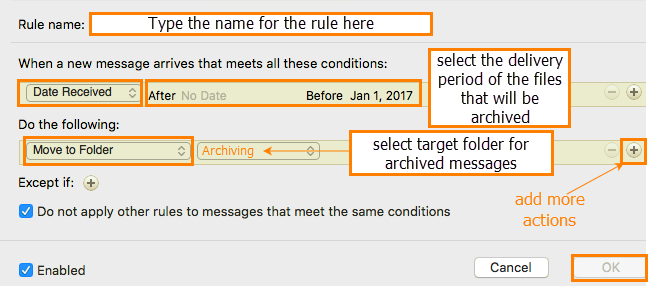
Note: Outlook interface might be different and you will be prompted to specify After and Before dates.
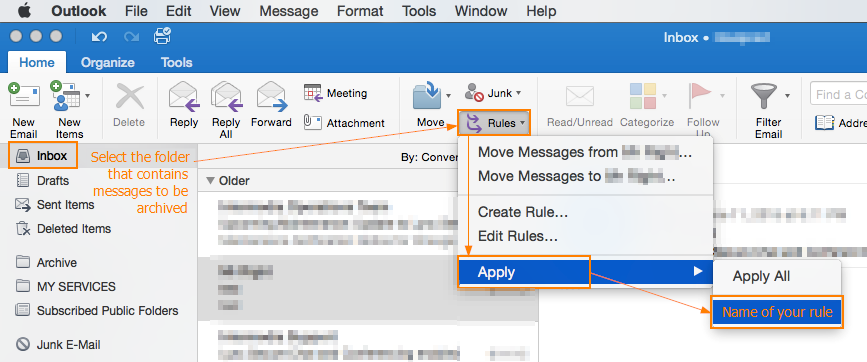
4.Click OK to save the rule. 5.Apply the rule by clicking on the source folder, then Rules > Apply > Name of the rule.
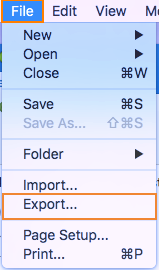
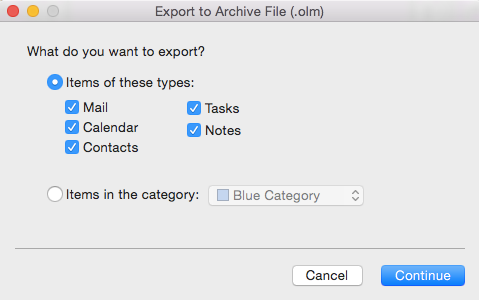
6.To export the data from the Archive folder navigate to File > Export. On dialog window choose types of items that should be included in the archive file. Click Continue.
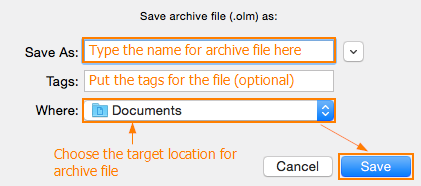
7.On next dialog window type the name of the archive file and select the location on your computer, where the file should be stored. You may add the tags optionally. Click Save.
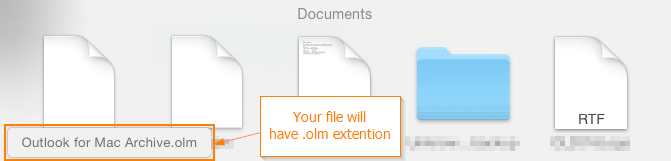
Note: When you run this rule for the first time, archiving may take a lot of time to complete depending on your mailbox size. 8.After the task completed you will find the .olm file with your mailbox items saved on the computer.
9.Confirm that items are in the file. Navigate to File > Import > Outlook for Mac archive file > choose the file. File will be displayed in the list of folders. If all items are in place, you may empty the Archive folder. |
 3.
3.
How to archive messages in the Mail app of Mac® OS X™ https://www.youtube.com/watch?v=LNLzCBd38H0
|
How to Connected to WiFi |