
(can only be done when connected to the school wifi)

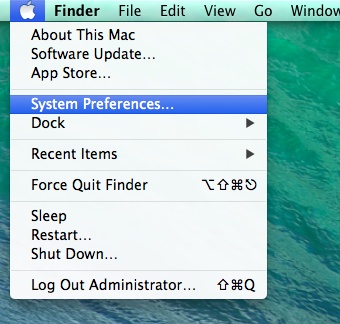
On your computer please select the apple in the top left hand corner then Navigate to System Preferences > Printers and Scanners.
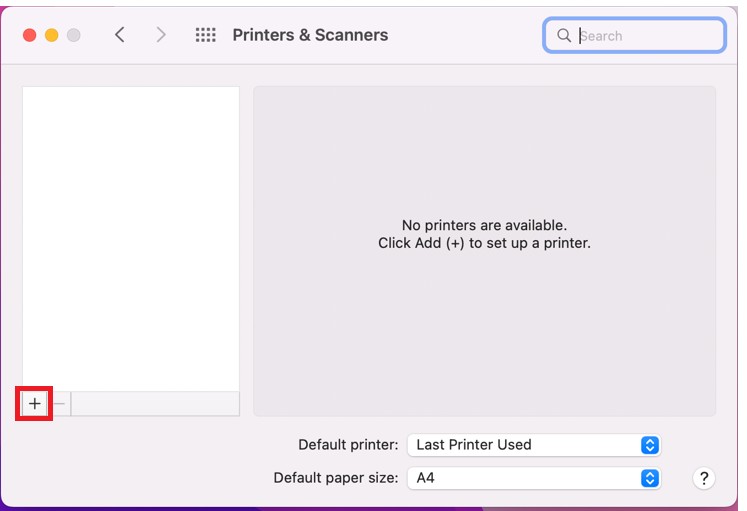
Click the + icon under the Printers List.  The Add dialog is displayed. It displays a list of all of the discovered printers on the network.
Select a printers.”all B&W printing” if you wish print any Black and white printer job and repeat the process for Colour printer and select
“all colour printing” which allow you to print Colour documents
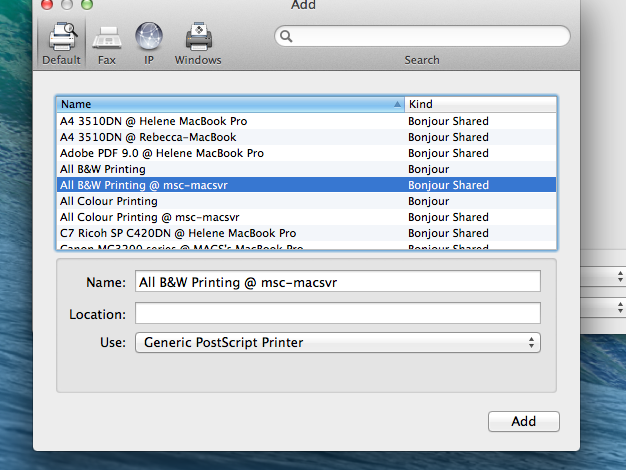
Make sure Use is set to Secure AirPrint.
- Click Add.
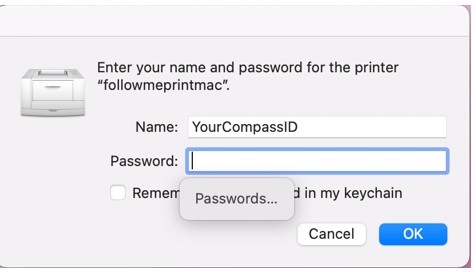
While printing a document select All B&W or Color printer and when prompted, enter your Compass username and password, not your laptop username and password.
- Students may collect their printouts from any designated printer by signing in with their Compass username and password.
Not your operating system? Try one of these:
 |
 |
 |
 |
More Info: https://youtu.be/Jw_uEQ9vgNw